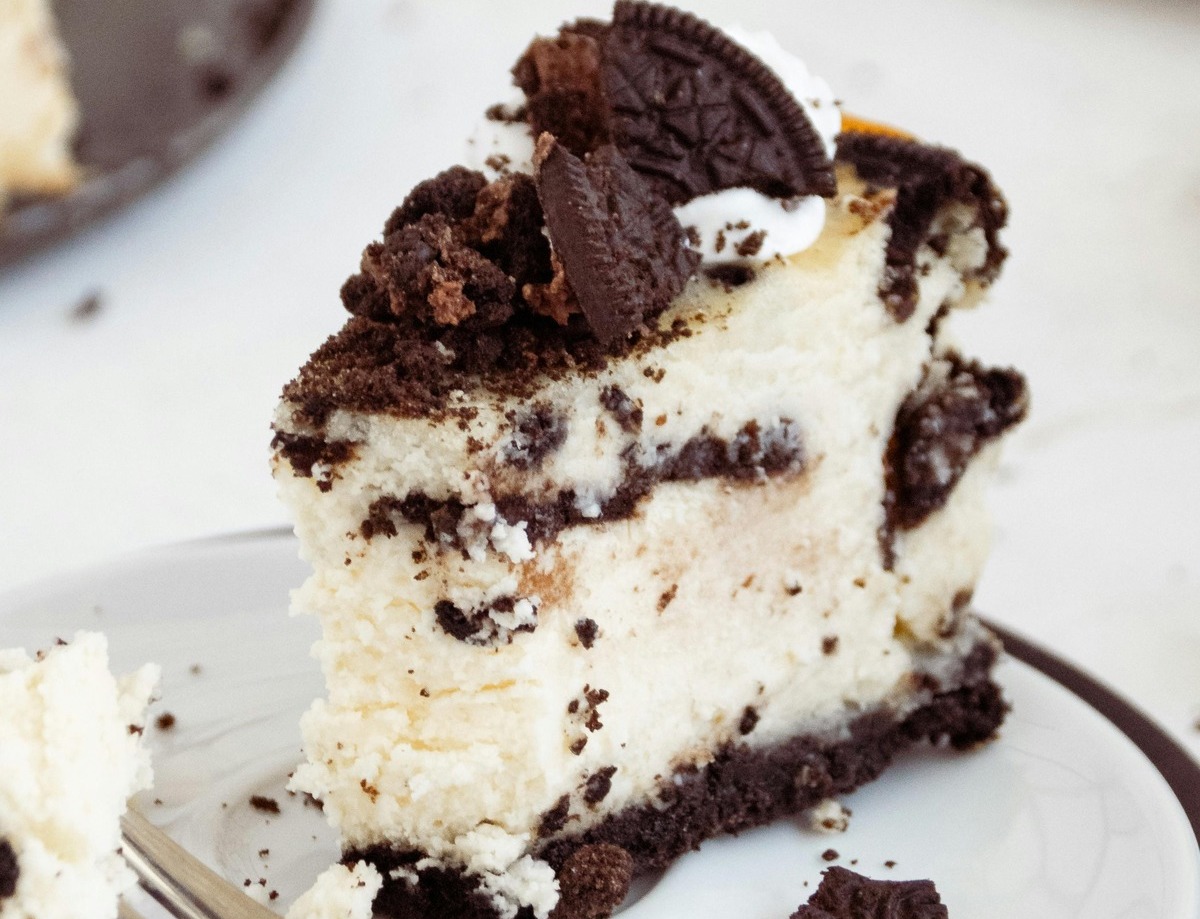
Indulge in the creamy, decadent delight of an Oreo cheesecake. This dessert combines the rich flavors of cream cheese and Oreo cookies to create a mouthwatering treat that's perfect for any occasion. Whether you're hosting a dinner party or simply craving something sweet, this Oreo cheesecake is sure to impress.
Most of the ingredients for this Oreo cheesecake are commonly found in your kitchen. However, you may need to pick up a few items at the supermarket. Make sure you have enough cream cheese and Oreo cookies on hand, as these are the stars of the recipe. Additionally, ensure you have vanilla extract and eggs to complete the creamy filling.

Ingredients for Oreo Cheesecake
Oreo cookies: These are used both for the crust and mixed into the cheesecake filling, providing a delightful crunch and chocolatey flavor.
Butter: Melted butter is combined with crushed Oreo cookies to form the base crust of the cheesecake.
Cream cheese: This is the main component of the cheesecake filling, giving it a rich and creamy texture.
Sugar: Used to sweeten the cheesecake filling.
Vanilla extract: Adds a hint of vanilla flavor to the cheesecake filling.
Eggs: These help to bind the cheesecake filling and give it structure.
Technique Tip for This Recipe
When mixing the cream cheese, sugar, and vanilla, ensure that the cream cheese is fully softened to avoid lumps in your cheesecake. This will result in a smoother and creamier texture. Additionally, when adding the eggs, do so one at a time and mix just until incorporated to avoid overbeating, which can cause cracks in the cheesecake during baking.
Suggested Side Dishes
Alternative Ingredients
crushed oreo cookies - Substitute with chocolate graham crackers: Chocolate graham crackers provide a similar texture and chocolate flavor, making them a good alternative for the crust.
melted butter - Substitute with coconut oil: Coconut oil can mimic the binding properties of butter and adds a subtle coconut flavor that complements the cheesecake.
softened cream cheese - Substitute with Greek yogurt: Greek yogurt can be used to reduce fat content while still providing a creamy texture and tangy flavor.
sugar - Substitute with honey: Honey can be used as a natural sweetener, offering a different but pleasant sweetness and additional moisture.
vanilla extract - Substitute with almond extract: Almond extract provides a different but complementary flavor profile to the cheesecake.
eggs - Substitute with flax eggs: Flax eggs (a mixture of ground flaxseed and water) can be used as a vegan alternative to eggs, providing similar binding properties.
chopped oreo cookies - Substitute with chopped chocolate chip cookies: Chocolate chip cookies offer a similar texture and chocolatey goodness, making them a good alternative for mixing into the cheesecake batter.
Other Alternative Recipes
How To Store / Freeze Your Dessert
Once your Oreo cheesecake has cooled to room temperature, cover it with plastic wrap or aluminum foil. This helps to prevent it from drying out and absorbing any unwanted odors from the fridge.
For short-term storage, place the covered cheesecake in the refrigerator. It will stay fresh for up to 5-7 days. Make sure to keep it on a flat surface to maintain its shape and texture.
If you plan to enjoy your dessert later, consider freezing it. First, chill the cheesecake in the fridge for a few hours to firm it up. This makes it easier to handle.
Once chilled, wrap the cheesecake tightly in plastic wrap, ensuring there are no gaps. Follow up with a layer of aluminum foil for extra protection against freezer burn.
For added convenience, you can slice the cheesecake into individual portions before freezing. Wrap each slice in plastic wrap and then place them in a freezer-safe container or a resealable plastic bag. This way, you can thaw only what you need.
When you're ready to indulge, transfer the desired amount of Oreo cheesecake from the freezer to the refrigerator. Allow it to thaw overnight for the best texture and flavor.
If you're in a hurry, you can also let the cheesecake sit at room temperature for about 30 minutes to an hour. However, avoid using a microwave to thaw it, as this can compromise the creamy consistency.
For an extra touch of freshness, garnish your thawed cheesecake with additional chopped Oreos or a drizzle of chocolate syrup before serving. This not only enhances the presentation but also adds a delightful crunch and flavor.
How To Reheat Leftovers
Preheat your oven to 275°F (135°C). Place the Oreo cheesecake on a baking sheet and cover it loosely with aluminum foil to prevent it from drying out. Heat for about 15-20 minutes or until warmed through.
Use a microwave-safe plate and place a slice of Oreo cheesecake on it. Microwave on medium power for 20-30 seconds. Check the temperature and continue in 10-second intervals if needed. Be cautious not to overheat, as the cream cheese can become rubbery.
For a more even reheating, use a double boiler. Place the Oreo cheesecake in a heatproof dish and set it over a pot of simmering water. Cover the dish and heat for about 10-15 minutes, checking occasionally to ensure it warms evenly.
If you prefer a cold dessert, simply let the Oreo cheesecake sit at room temperature for about 30 minutes before serving. This method helps maintain its creamy texture without altering the flavor.
Best Tools for This Recipe
Oven: Used to bake the cheesecake at the specified temperature to ensure it sets properly.
Springform pan: Essential for making cheesecakes as it allows for easy removal of the cake without damaging it.
Mixing bowl: Used to combine and mix the ingredients for the cheesecake filling.
Electric mixer: Helps to beat the cream cheese, sugar, and vanilla until smooth, ensuring a creamy texture.
Spatula: Useful for folding in the chopped Oreos and scraping down the sides of the mixing bowl.
Measuring cups: Needed to measure out the sugar and melted butter accurately.
Measuring spoons: Used to measure the vanilla extract precisely.
Knife: Required to chop the Oreos into smaller pieces for folding into the batter.
Food processor: Optional but helpful for crushing the Oreos into fine crumbs for the crust.
Refrigerator: Necessary for cooling and setting the cheesecake after it has baked.
Cooling rack: Allows the cheesecake to cool evenly after baking before refrigerating.
Parchment paper: Optional but can be used to line the bottom of the springform pan for easier removal of the crust.
How to Save Time on This Recipe
Prepare the crust in advance: Mix crushed oreos and melted butter ahead of time and store in the fridge.
Use a food processor: Quickly crush oreo cookies and mix the cream cheese mixture using a food processor.
Room temperature ingredients: Ensure cream cheese and eggs are at room temperature for easier mixing.
Pre-chop oreos: Chop the oreo cookies in advance and store them in an airtight container.
Line the pan: Use parchment paper to line the springform pan for easy removal and cleanup.

Oreo Cheesecake
Ingredients
Crust
- 24 pieces Oreo cookies crushed
- ¼ cup Butter melted
Filling
- 3 packages Cream cheese softened
- 1 cup Sugar
- 1 teaspoon Vanilla extract
- 3 units Eggs
- 12 pieces Oreo cookies chopped
Instructions
- Preheat oven to 350°F (175°C).
- Mix crushed Oreos and melted butter. Press into the bottom of a springform pan.
- Beat cream cheese, sugar, and vanilla until smooth. Add eggs one at a time, mixing well after each addition.
- Fold in chopped Oreos. Pour mixture over crust.
- Bake for 60 minutes or until the center is set. Cool and refrigerate before serving.
Nutritional Value
Keywords
Suggested Appetizers and Main Courses
Check out these recipes too!
- Baja Sauce Recipe for Fish or Shrimp Tacos10 Minutes
- Garlic Naan Recipe30 Minutes
- Swedish Hard Tack Recipe45 Minutes
- Dutch Crunch Rolls Recipe45 Minutes
- Strawberry Glazed Pie Recipe50 Minutes
- Spanakopita Greek Spinach Pie Recipe1 Hours 15 Minutes
- Breakfast Rice Recipe30 Minutes
- Italian Rice Pie Recipe1 Hours 20 Minutes
- Cottage Cheese Bread Recipe1 Hours
- Savory Parmesan French Toast Recipe25 Minutes
- Applesauce Bread Recipe1 Hours
- Vegan Pumpkin Pie Smoothie Recipe10 Minutes


Leave a Reply