
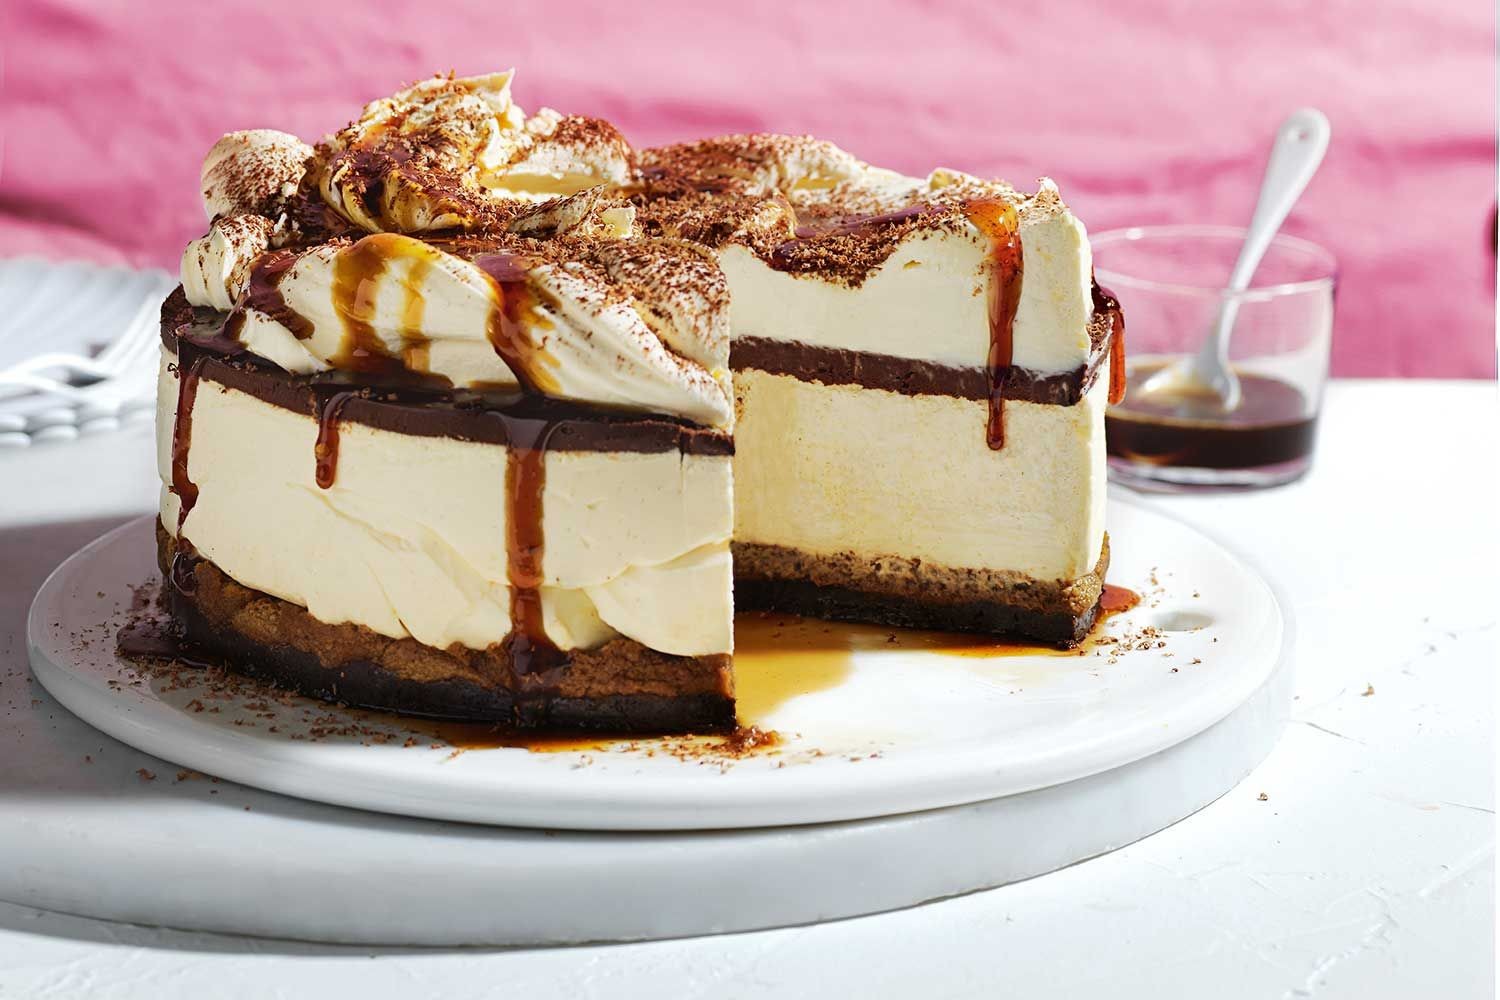
Indulge in the luxurious fusion of two classic desserts with this Tiramisu Cheesecake. This recipe combines the rich, creamy texture of a cheesecake with the bold flavors of tiramisu, creating a dessert that's perfect for any special occasion or simply to treat yourself.
Some ingredients in this recipe might not be staples in your pantry. Mascarpone cheese is a key component of traditional tiramisu, offering a rich and creamy texture. Coffee liqueur and espresso provide the distinctive coffee flavor. Ensure you have these on hand before starting.
Ingredients For Tiramisu Cheesecake Recipe
Graham cracker crumbs: Used as the base for the cheesecake crust, providing a crunchy texture.
Melted butter: Binds the graham cracker crumbs together to form the crust.
Cream cheese: The main component of the cheesecake filling, giving it a rich and creamy texture.
White sugar: Sweetens the cheesecake filling.
Vanilla extract: Adds a hint of vanilla flavor to the filling.
Sour cream: Adds creaminess and a slight tang to the cheesecake filling.
Eggs: Help to bind the filling together and provide structure.
Coffee liqueur: Adds a rich coffee flavor to the cheesecake.
Brewed espresso: Enhances the coffee flavor in the cheesecake.
Mascarpone cheese: Used in the topping, adding a creamy and rich texture.
Heavy cream: Combined with mascarpone to create a smooth topping.
Powdered sugar: Sweetens the mascarpone topping.
Cocoa powder: Dusting on top of the cheesecake for a classic tiramisu finish.
Technique Tip for This Recipe
When mixing the cream cheese and sugar, ensure the cream cheese is fully softened to avoid lumps. Beat the mixture on medium speed until it is completely smooth and creamy. This will create a silky texture for your cheesecake. Additionally, when adding the eggs, incorporate them one at a time and mix just until combined to prevent overbeating, which can cause the cheesecake to crack.
Suggested Side Dishes
Alternative Ingredients
graham cracker crumbs - Substitute with digestive biscuit crumbs: Digestive biscuits have a similar texture and flavor, making them a great alternative for the crust.
melted butter - Substitute with coconut oil: Coconut oil provides a similar binding effect and adds a subtle coconut flavor.
cream cheese - Substitute with Neufchâtel cheese: Neufchâtel cheese has a similar texture but is lower in fat, making it a healthier option.
white sugar - Substitute with coconut sugar: Coconut sugar has a lower glycemic index and adds a slight caramel flavor.
vanilla extract - Substitute with almond extract: Almond extract offers a different but complementary flavor profile.
sour cream - Substitute with Greek yogurt: Greek yogurt provides a similar tangy flavor and creamy texture but with added protein.
eggs - Substitute with flax eggs: Flax eggs are a great vegan alternative and provide a similar binding effect.
coffee liqueur - Substitute with strong brewed coffee: Strong brewed coffee can mimic the flavor without the alcohol content.
brewed espresso - Substitute with instant espresso powder: Instant espresso powder dissolved in water can provide a similar strong coffee flavor.
mascarpone cheese - Substitute with cream cheese: Cream cheese can be used as a substitute but may be slightly tangier and less creamy.
heavy cream - Substitute with coconut cream: Coconut cream provides a similar richness and can be used as a dairy-free alternative.
powdered sugar - Substitute with granulated sugar blended into powder: Blending granulated sugar into a fine powder can mimic the texture of powdered sugar.
cocoa powder - Substitute with carob powder: Carob powder offers a similar color and a slightly different but pleasant flavor.
Alternative Recipes Similar to This Cheesecake
How to Store or Freeze This Cheesecake
Allow the tiramisu cheesecake to cool completely at room temperature before storing. This helps prevent condensation from forming inside the storage container, which can make the cheesecake soggy.
Once cooled, cover the cheesecake with plastic wrap or aluminum foil. Ensure the wrap touches the surface of the cheesecake to prevent a skin from forming.
For added protection, place the wrapped cheesecake in an airtight container. This will help maintain its freshness and prevent it from absorbing any odors from the refrigerator.
Store the tiramisu cheesecake in the refrigerator for up to 5 days. The mascarpone and cream cheese filling will stay creamy and delicious during this time.
If you wish to freeze the cheesecake, first chill it in the refrigerator for at least 4 hours to firm up. This makes it easier to handle and prevents it from becoming misshapen.
After chilling, wrap the cheesecake tightly in plastic wrap, followed by a layer of aluminum foil. This double wrapping helps protect against freezer burn.
For convenience, consider slicing the cheesecake into individual portions before freezing. Wrap each slice in plastic wrap and then place them in a single layer inside a freezer-safe container or a resealable plastic bag.
Label the container or bag with the date to keep track of how long the cheesecake has been frozen. The tiramisu cheesecake can be frozen for up to 2 months without significant loss of quality.
To thaw, transfer the desired amount of cheesecake from the freezer to the refrigerator. Allow it to thaw overnight or for at least 6 hours. Avoid thawing at room temperature to maintain the texture and prevent any potential bacterial growth.
Before serving, let the cheesecake sit at room temperature for about 30 minutes to soften slightly, enhancing its creamy texture and flavor.
How to Reheat Leftovers
Oven Method: Preheat your oven to 250°F (120°C). Place the tiramisu cheesecake on a baking sheet and cover it loosely with aluminum foil to prevent it from drying out. Heat for about 15-20 minutes or until warmed through. This method helps maintain the creamy texture of the cheesecake.
Microwave Method: Place a slice of tiramisu cheesecake on a microwave-safe plate. Heat on medium power for 20-30 seconds. Check the temperature and continue heating in 10-second intervals if needed. Be cautious not to overheat, as the cheesecake can become rubbery.
Water Bath Method: Preheat your oven to 250°F (120°C). Place the tiramisu cheesecake in a heatproof dish. Fill a larger baking dish with hot water and place the dish with the cheesecake inside it, creating a water bath. Heat for about 20-30 minutes. This gentle method helps keep the cheesecake moist and creamy.
Room Temperature Method: If you prefer not to use heat, simply let the tiramisu cheesecake sit at room temperature for about 30 minutes to an hour. This method is ideal for maintaining the integrity of the mascarpone topping and the overall texture of the cheesecake.
Essential Tools for This Recipe
Oven: Used to bake the cheesecake at a consistent temperature of 325°F (165°C).
Springform pan: A 9-inch pan with removable sides, essential for easily releasing the cheesecake without damaging it.
Mixing bowl: Needed for combining ingredients like graham cracker crumbs and melted butter, as well as for mixing the cheesecake batter.
Electric mixer: Useful for beating the cream cheese, sugar, and vanilla until smooth, and for blending in the sour cream.
Spatula: Handy for scraping down the sides of the mixing bowl to ensure all ingredients are well incorporated.
Measuring cups: Necessary for accurately measuring ingredients like graham cracker crumbs, sugar, coffee liqueur, and heavy cream.
Measuring spoons: Needed for precise measurements of ingredients like vanilla extract.
Cooling rack: Allows the cheesecake to cool evenly after baking.
Refrigerator: Essential for chilling the cheesecake for at least 4 hours to set properly.
Small bowl: Used for mixing the mascarpone, heavy cream, and powdered sugar until smooth.
Sifter: Useful for dusting the top of the cheesecake with cocoa powder before serving.
Knife: For cutting the cheesecake into slices when ready to serve.
Serving plate: To present the finished tiramisu cheesecake elegantly.
Time-Saving Tips for Making This Cheesecake
Prepare the crust ahead: Mix graham cracker crumbs and melted butter the night before and store in the fridge.
Use room temperature ingredients: Soften cream cheese and eggs to ensure smooth blending, saving mixing time.
Brew espresso in advance: Cool the espresso ahead of time to avoid waiting during preparation.
Quick chill method: Place the cheesecake in the freezer for 1 hour before transferring to the fridge to speed up chilling.
Pre-mix topping: Combine mascarpone, heavy cream, and powdered sugar while the cheesecake bakes, then refrigerate.
Tiramisu Cheesecake
Ingredients
Crust
- 1 ½ cups graham cracker crumbs
- ¼ cup melted butter
Filling
- 3 (8 oz) packages cream cheese, softened
- 1 cup white sugar
- 1 teaspoon vanilla extract
- 1 cup sour cream
- 3 eggs
- ¼ cup coffee liqueur
- ¼ cup brewed espresso, cooled
Topping
- ¼ cup mascarpone cheese
- ¼ cup heavy cream
- ¼ cup powdered sugar
- ¼ cup cocoa powder
Instructions
- Preheat oven to 325°F (165°C). Grease a 9-inch springform pan.
- Mix graham cracker crumbs and melted butter. Press into the bottom of the pan.
- Beat cream cheese, sugar, and vanilla until smooth. Blend in sour cream.
- Add eggs one at a time, mixing well after each addition.
- Stir in coffee liqueur and espresso. Pour over crust.
- Bake for 1 hour. Turn off oven, leave cheesecake inside for 1 hour.
- Chill in refrigerator for at least 4 hours.
- Mix mascarpone, heavy cream, and powdered sugar until smooth. Spread over cheesecake.
- Dust with cocoa powder before serving.
Nutritional Value
Keywords
Suggested Appetizers and Main Courses
Check out these recipes too!
- Baja Sauce Recipe for Fish or Shrimp Tacos10 Minutes
- Garlic Naan Recipe30 Minutes
- Swedish Hard Tack Recipe45 Minutes
- Dutch Crunch Rolls Recipe45 Minutes
- Strawberry Glazed Pie Recipe50 Minutes
- Spanakopita Greek Spinach Pie Recipe1 Hours 15 Minutes
- Breakfast Rice Recipe30 Minutes
- Italian Rice Pie Recipe1 Hours 20 Minutes
- Cottage Cheese Bread Recipe1 Hours
- Savory Parmesan French Toast Recipe25 Minutes
- Applesauce Bread Recipe1 Hours
- Vegan Pumpkin Pie Smoothie Recipe10 Minutes
Leave a Reply